Our Rental Kitchen DIY: Tic Tac Tile
Hello, lovely people! Wow it’s been a hot minute since I’ve felt compelled to share a blog post on West Coast Aesthetic. I fully blame our global pandemic that has tipped the world on its axis. But, I’m starting to feel re-energized to share content and creations from the past few months that I’ve been pouring my heart into. With that said, my love for interior design has flourished in quarantine — yes, in large part this is due to spending 24 hours a day, at home. It’s amazing the things you notice (or in my case, fixate on) when you’re in your home working, eating, relaxing, sleeping 24/7. You’re able to pinpoint the things you love about your space and also the things you hate…
Tristan and I spend all of our days in our 865 square foot rental (aside from a few socially distanced activities) which means we’re sharing a working and living space. The majority of our time is spent in the living area — which in our case, is a combination of living, dining and kitchen in more of an open floor plan.
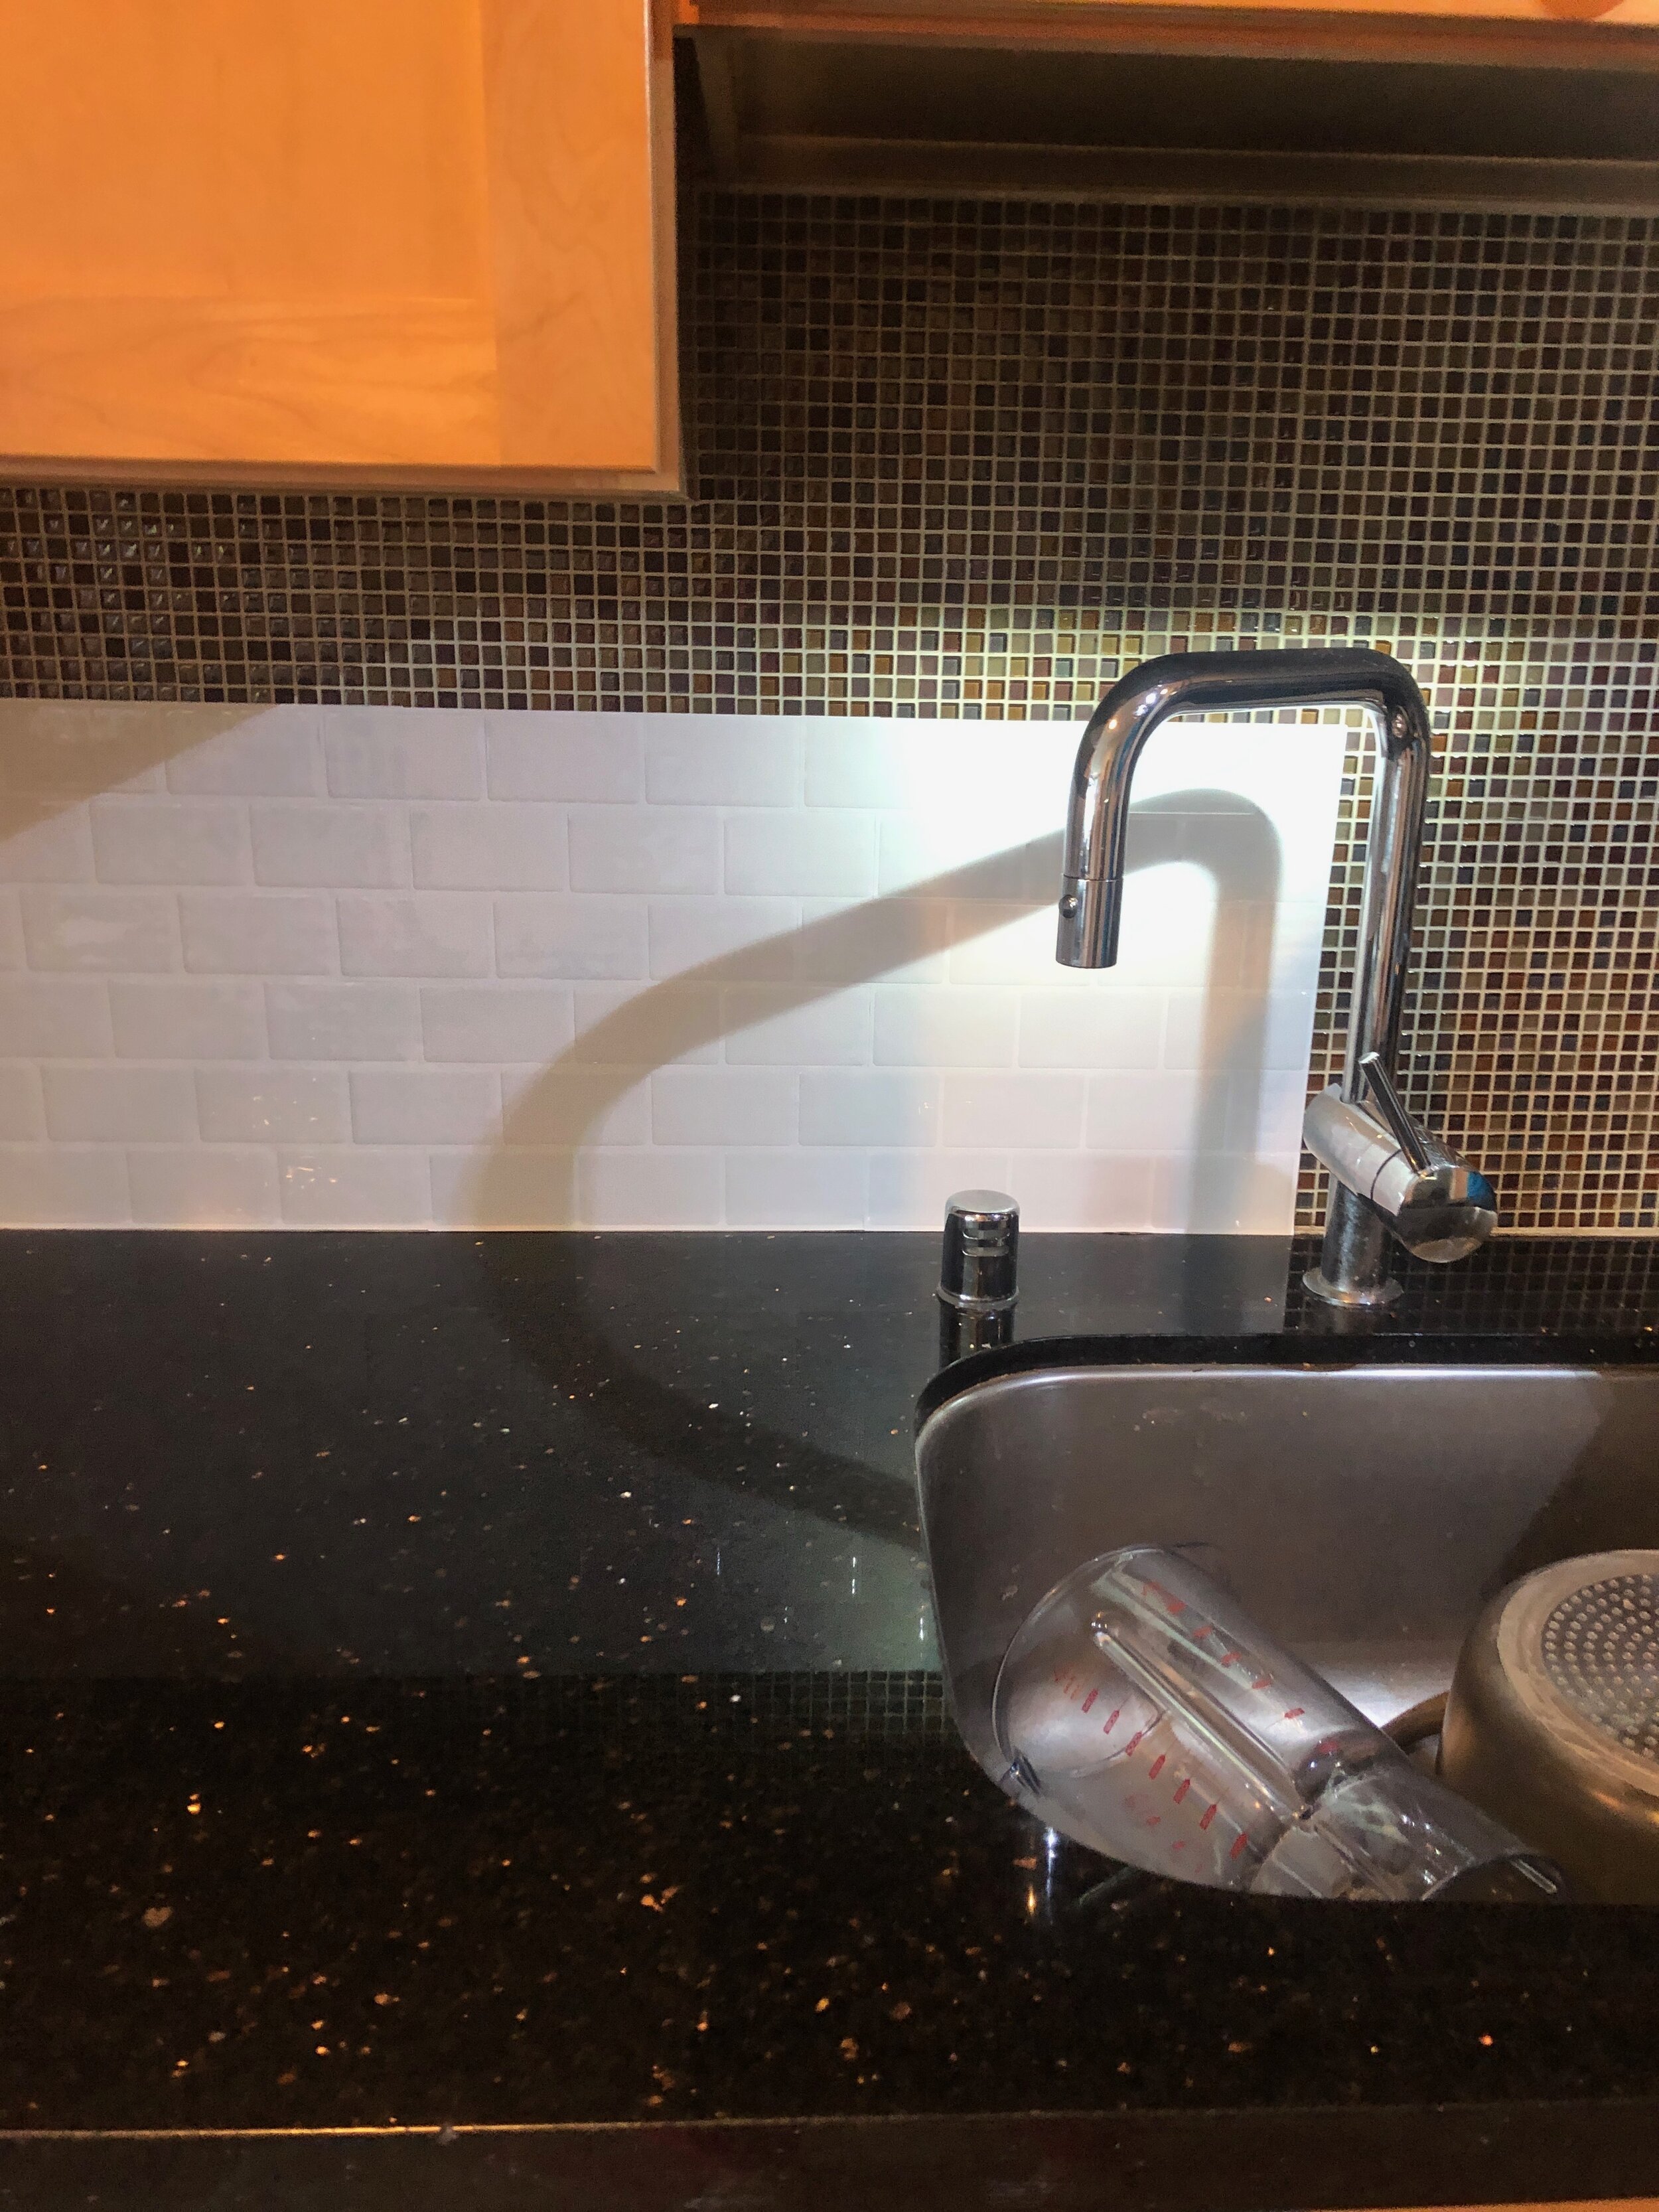
So let’s talk about the kitchen. For some odd and questionable reason, our landlord chose a dated black granite countertop, medium tone (honestly, orange) cabinets with black hardware and hideous brown tiled/mosaic backsplash. Our apartment faces west so we get a ton of sun and our home feels light, bright and airy. Except for in the kitchen with its darker tones. Spending so much time in our kitchen during quarantine cooking, prepping and eating meals, I started to realize this space just made me, sad.
Here’s the before pictures of our kitchen —


I’ll be fully transparent and tell you, I’m a creative person but a novice DIY-er. I started down a rabbit hole of how I could temporarily brighten up our rental kitchen so it wasn’t a space I loathed. And that’s when I stumbled across peel and stick tile. Apparently this has been quite “the thing” to do in lockdown and seeing the before and after photos won me over. After doing some research on the durability, removal process (this is key for renters) and overall quality/aesthetic, I decided to get our rental kitchen DIY in the works with Tic Tac Tile.
Here’s a break down of the Tic Tac Tile I chose:
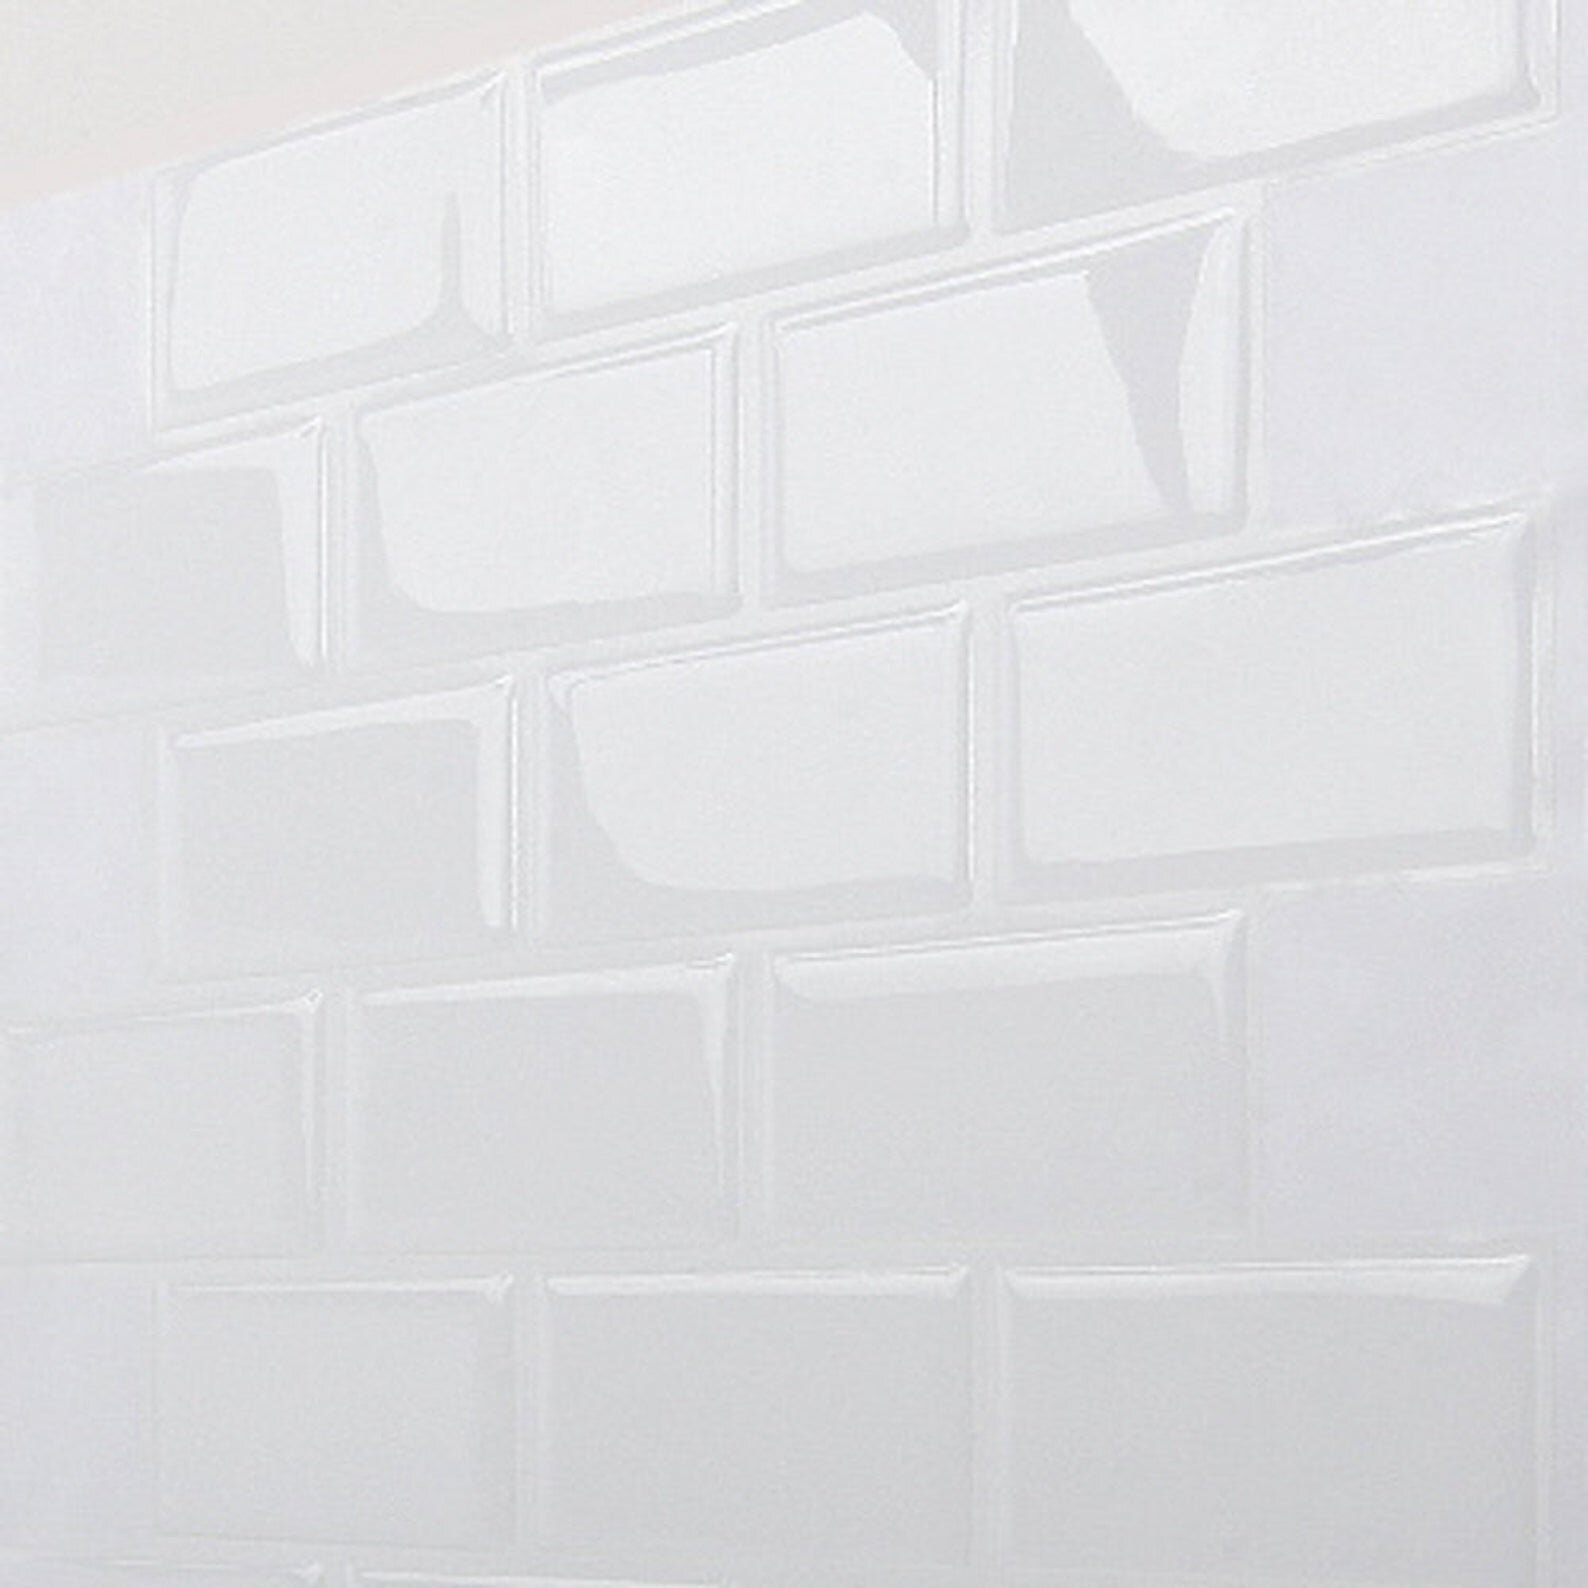
The tile we used: I chose the Tic Tac Tiles 12 x 12 Subway White Tile. I ordered the tile from their Etsy shop because it actually was cheaper than online retailers. I wanted a tile that was heat, oil and water resistant (key for a kitchen). These tiles look and actually feel like real ceramic tile — they have a coating to give them a 3D effect. When people see them in person, they do not even realize the tile is peel and stick!

How much to get: I looked up several square footage calculators online (Home Depot has one) to determine the amount of tile we would need. I wanted to account for mistakes, so I ordered 4 boxes (with 10 sheets in each box) so we had 40 square feet of tile to use. We ended up having three tile sheets left over. I purchased these tiles when they were marked down from their original price so it added up to be around $140 total.
The color: We opted for subway white because we liked the sleek appearance of the white tile with white grout. I’m not a huge fan of dark grout colors. Also, PRO TIP! White on white gives you a lot more flexibility and room for error! If you opt for a darker grout, you’ll have to be extra cautious when cutting out your tiles and lining them up because the grout lines will show.
Supplies: We used scissors, an xacto knife, a pencil and a ruler for our supplies. Also have a degreaser handy. Before applying the tiles, you need to degrease your surface.
Before you start: We used 409 cleaner and a multi-purpose cleaner from Trader Joe’s to go over our existing mosaic tile to remove any oil and grease. If you skip this process, your tiles will not stick!
The application: This process is tedious, especially if you have a kitchen backsplash that doesn’t go straight across. The tile sheets have a sticky adhesive backing that you peel off to attach to the surface — the stickiness wears off if you place your tile and peel it up to start over, so try to get the application down on your first or second try. We had to measure to account for outlets, cabinets and bringing the tile up and around the hood. I watched several Youtube tutorials using Tic Tac Tile before we started so I had a general grasp on the process since the tile sheets are like fitting together puzzle pieces. Tristan is a wizard with measurements and efficiency, so thanks to him, we were able to develop a system! We started by applying tile all the way across (working around outlets) and then made our way up. It took a long time — we started this project at 11am and finished around 9pm that evening. I’m a firm believer in finishing projects when we start them vs. taking breaks — but for your own sanity, breaking this project up into a weekend might be a smart solution.

The removal process: We haven’t removed the tile yet — I’ll save that for a future blog post when we move out. But, this tile is apparently fairly easy to remove. You apply heat from a blowdryer to the edges and peel it up. Full disclosure: we put our tile over the mosaic tile, which is less damaging than if you put the tile over a painted wall.
The after —
After a long day of ‘tiling’ we couldn’t believe how much our space was transformed. Instantly lighter and brighter! When we first started the process I started to doubt myself because some of the smaller, mosaic tile was bleeding through but once we worked our away across the mosaic tile underneath became less obvious if not completely invisible.
We had dark black outlets before in the kitchen, so we had to purchase and install white outlets so they didn’t stand out against our new backsplash. Unfortunately, due to the sloppy mosaic tiling job in our rental, one of the outlets was not able to be swapped out so I had to do some restyling on the countertop to hide the remaining black outlet.


Overall, we’re so impressed by the durability of these tiles! They hold up with water, oil and high heat from our gas stove. We haven’t noticed any peeling or discoloration which was a concern of mine. I can finally say after two years of living in our rental and through a global pandemic, it feels like home. It’s not perfect — and it likely won’t be until we own a home, but for now, this space makes me so happy.
PS. Want to shop the rest of my kitchen countertop? Linking key items here.
Society 6 Art Print: Fruit Salad
Olive oil dispenser (for dish soap)
Society 6 Art Print: Bagels Bagels Bagels